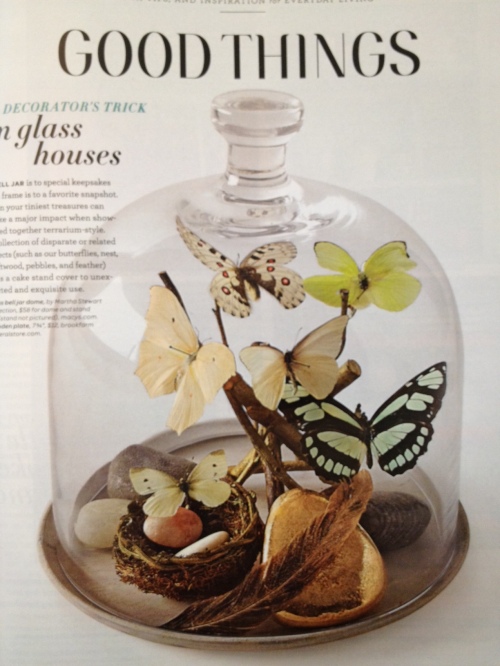
In spite of her jailbird history, Martha Stewart is pretty much my idol. I mean, how much craftier could one human being BE? Anyhoo, since I started my new job, I’ve had the joy of reading Martha’s magazine every month, thanks to a coworker who brings her issues in after perusing them. When I stumbled across this image in a recent issue, I was instantly smitten and knew I had to recreate this amazing vignette. Sidenote: Allow me to apologize in advance. I finally bit the bullet and kicked my Zack Morris phone to the curb in favor of an iPhone – which means lots and lots of my pictures are from the uber-handy camera phone. Quality be darned!
Based on my highly technical assessment of the situation (read: after staring at the magazine for a few minutes), I came up with my list of supplies:
- Glass cloche with wood base
- Butterflies
- Sticks
- A rock
- Bird’s nest with eggs
Since I already own a cloche (commonly referred to as “my precious”), plus a small nest and eggs that I put to work in a Christmas vignette, there were just a few things left to acquire. I started with sticks and rocks, and luckily, the great outdoors is stocked to the gills with rocks and sticks.
Next on the list: faux butterflies. Although you can purchase preserved real butterflies from numerous sources online, I knew that wasn’t for me. Instead, I stopped by my local Michael’s and picked up a few different packages of fake butterflies, sticking as closely to Martha’s gorgeous, neutral palette as I could.

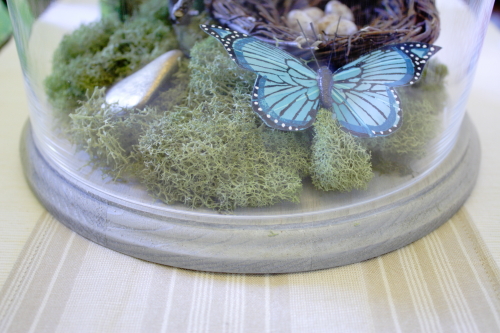
I also snagged an 8-inch round, unfinished wood circle with some pretty routed edges, and some grey stain – new from our friends at Minwax.
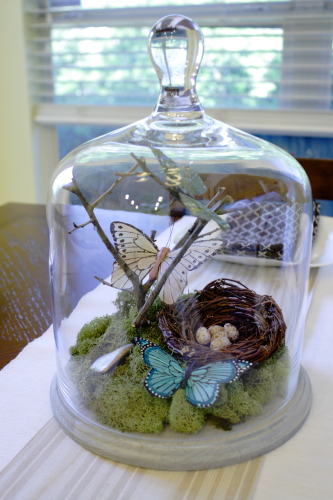
 With my small haul of goodies in tow, I headed home to get started. First up was staining the base – a coat of Minwax wood conditioner, followed by a single coat of grey stain, and then two light coats of whitewashing (while this sounds like a lot of work, I literally spent about 15 minutes on getting the base the perfect shade of aged grey).

My wrangled-from-the-yard rock got a shiny makeover with a little bit of gold Rub’N’Buff (the name gives you all the directions you need – seriously. Rub the gold finish on, and then use a clean cloth to buff it off, leaving the perfect glimmering golden sheen. It’s a-mazing).
To get my mini-tree to stand up properly, I cut a small circle of cardboard and hot-glued my branch directly on to it.
 Once the hot glue had set, I proceeded to trim the “tree” until it fit neatly under my cloche.
 Then I set the cardboard piece onto my wooden base, covered up the ugliness with some preserved moss, threw in my nest’n’eggs, topped it with the golden rock, and hot glued my butterflies to branches. Last step was enclosing it all under my precious, and parking it in the middle of our kitchen table. That Martha is a genius.

Recreating this project on your own? You can snap up most of the supplies you need at a local craft store, plus a quick trip to your local World Market should net you a pretty glass cloche. You can also snag yours online from World Market!
Am I the only one who’s forgiven Martha for being a little criminal? Or are y’all on the same Martha-lovin’ page as me?
Linking up to Remodelaholic!


Stunning. I love this design!
Thanks so much, Cristy! 🙂
still love me some martha 😉
Jen, your parties are a page out of her book! Flawless. This post made me think of you!
Love this! and I am with you on loving Martha! 🙂
Thanks, Amy! Glad to have good company in being a Martha fan, in spite of her checkered past. 🙂
What a great spring project!
And BTW- I love your nest, I think it out styles Martha’s!
Yay! Best compliment ever! Thanks, Cara.
A-mazing! Love love love! Now I’m inspired to go make me one of those! It looks so expensive! You and Livvy did a great job!
It only looks expensive! I spent less than $20 on supplies, and I’ve got tons of leftover butterflies and a whole can of grey stain. Soooo, I know where you can get some free butterflies when you want to make yours. 🙂